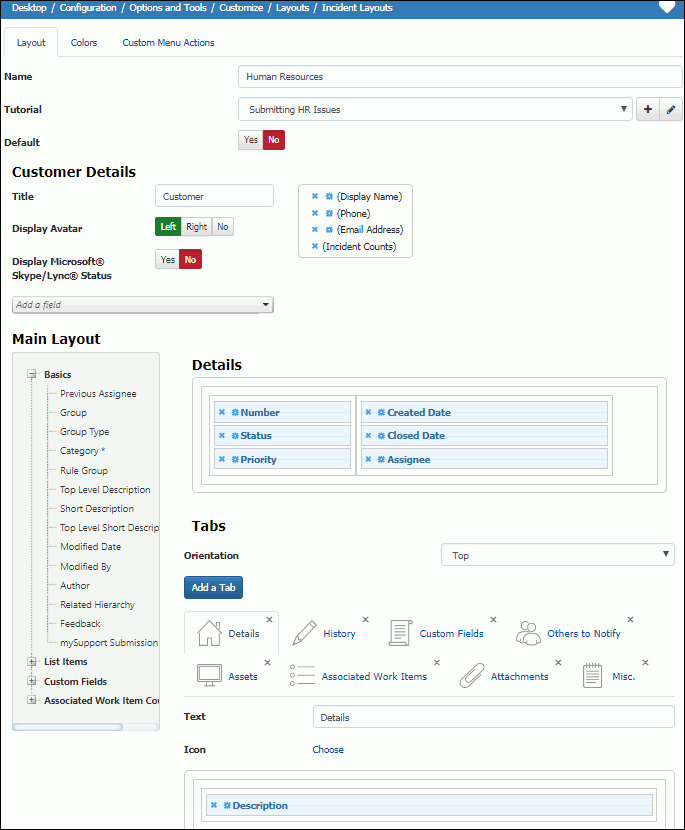
Use the Layout screen to modify iSupport's default layouts and/or create new ones with fields and tabs that are specific to your company. See Configuring Layouts for information on assigning layouts.
Use the Tutorial field to associate a tutorial that will display the first time the support representative accesses a screen with the layout. A tutorial consists of a series of steps, each with an 800x600 image and tags that a user can click to display an additional screen of content. Use the Create New and View/Edit icons to access the Options and Tools | Customize | Tutorials screen to create a tutorial or view/modify the selected tutorial; in that screen you can associate a tutorial with entry screen layouts, configuration screens, Rep Desktop dashboards, and mySupport dashboards.
Select Yes in the Default field to display the layout if none is associated with current support representative group, customer group, category, incident template, or hierarchy template.
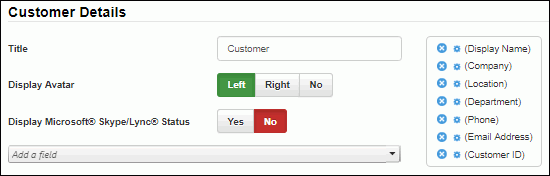
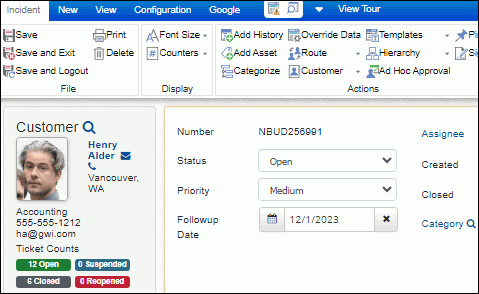
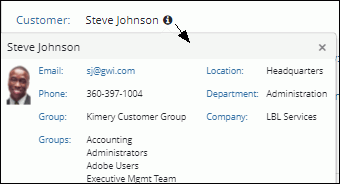
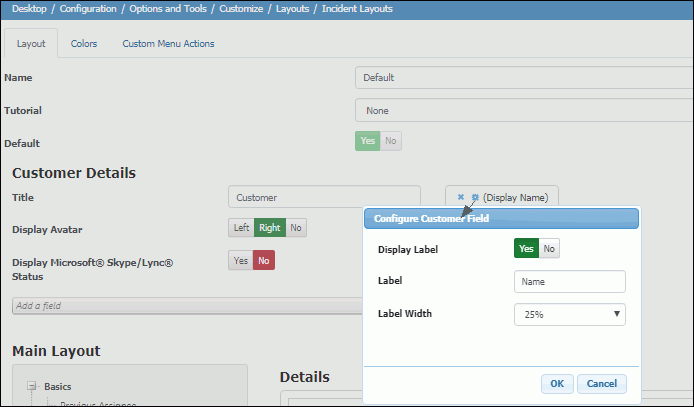
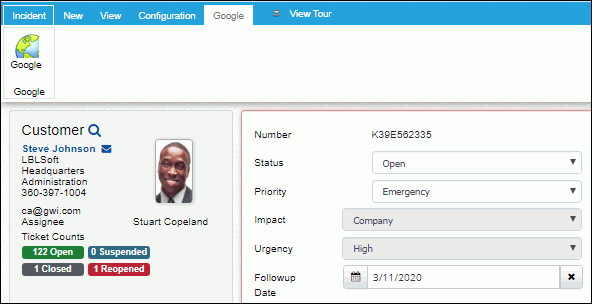
The Customer Details section will appear in the Incident and Change Layout configuration screens. Use the Title field to customize the text to appear to the left of the search icon in the customer section; "Customer" will appear by default.
To include the customer’s avatar (uploaded via the Customer Profile screen or the mySupport portal), select Left or Right in the Display Avatar field. Use the Add a Field dropdown to select the fields to appear in the upper left Customer area at the top of the Incident screen.
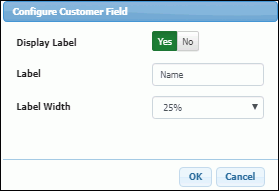
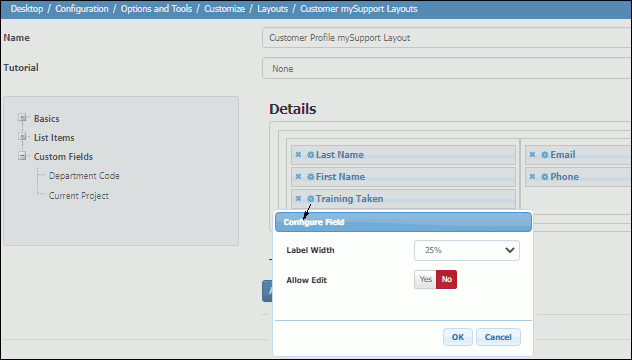
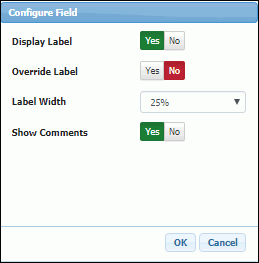
After adding a field, click the Configure ![]() icon
to display the Configure
Customer Field dialog and enable or disable the field
label, enter the field label, and select the field label width (which
is a percentage of the column in which the field is included). Note that
the Ticket Counts field will include
Open, Closed, Suspended, and Reopened links in the Customer
section in the Incident and Change screens.
icon
to display the Configure
Customer Field dialog and enable or disable the field
label, enter the field label, and select the field label width (which
is a percentage of the column in which the field is included). Note that
the Ticket Counts field will include
Open, Closed, Suspended, and Reopened links in the Customer
section in the Incident and Change screens.
Use the Display Microsoft® Skype/Lync® Status field to include an icon that will display the Microsoft Skype/Lync status of a selected customer in the Incident and Change screens and enable the support representative to access Microsoft Lync functions. In order for the icon to appear, Microsoft Skype or Lync 2013 or later must be installed on your system, the support representative viewing the incident must be using Internet Explorer 10 or 11, and iSupport must be in the intranet or added to trusted sites.
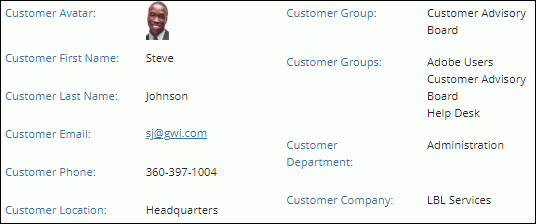
There are two methods to include fields for customer information on mySupport portals:
You can use the Allow Edit field on the Configure Field dialog for custom fields on mySupport display layouts to disable/enable an individual Customer Profile custom field to be edited by customers with the mySupport Custom Fields Editor permission.
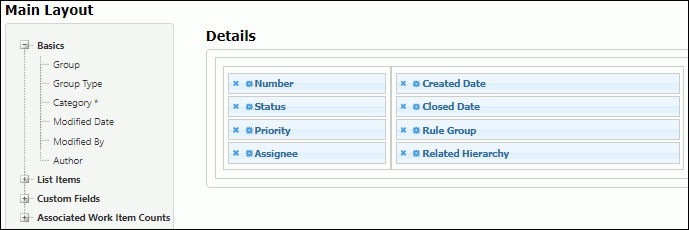
To configure the Details section in the upper right section of the resulting screen, drag fields from the selector on the left to the middle of the Details area on the Layout screen. Required fields are designated with an asterisk in the selector on the left. You can drag a field to the lower part of the Details section to create a subsection for a field.
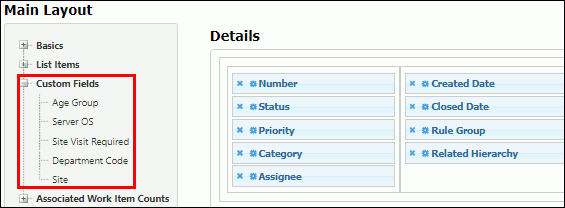
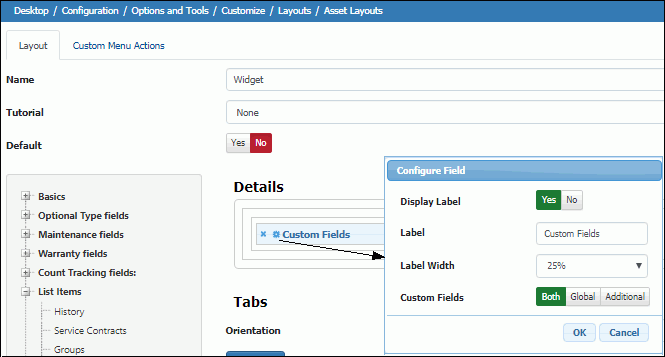
Global custom fields can be defined in the Custom Fields screen for the type of work item screen for which you're creating a layout, and additional custom fields can be defined for a category, asset type, CI type, change type, and cost center. To include custom fields on a layout, you can:
 icon to display the Configure
Field dialog and select the types of custom fields
to include: global custom fields, additionally defined custom fields,
or both.
icon to display the Configure
Field dialog and select the types of custom fields
to include: global custom fields, additionally defined custom fields,
or both.
A [Separator] field is included for mySupport layouts; it will be blank after you drag it to the Details section or a tab. You can enter a label for it or leave it blank, and it can be used multiple times for adding blank areas to your layout. A Save Button option is included in Submit layouts; if you include it in your layout, the default Save button will still be retained at the top of the Submit screen.
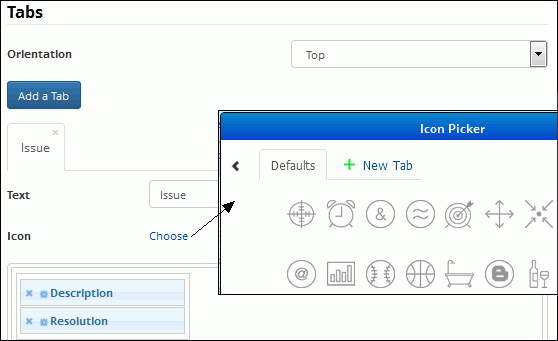
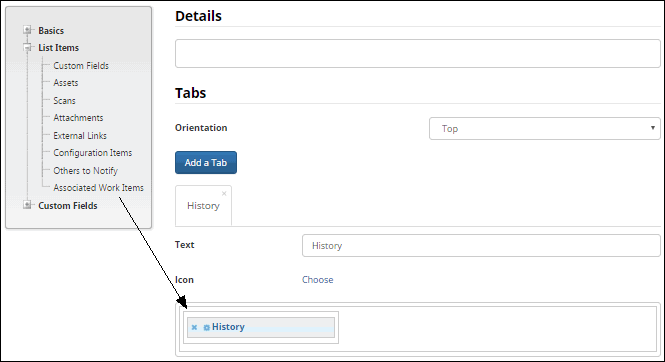
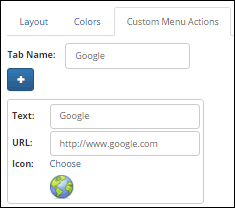
Tabs can display in a row above fields or to the left of fields on the lower half of the resulting screen. To add a tab, click the Add a Tab button and then click on the new tab (named "Tab" by default). Use the Text field to enter the label for the tab. Click the Choose link in the Icon field to select a default or custom image to appear to the left of any text entered as a label. (If no text is entered, only the selected icon will appear.)
To add fields to the tab, drag fields from the selector on the left side of the Layout screen to the middle of the section below the Icon field.
Note: The Description field is optional on mySupport incident submit layouts. The following text will be included in the Description field after submission: "Description field not included in <layout name> mySupport incident submit layout." If the layout is associated with a template, the description configured in the template, if any, will be used.
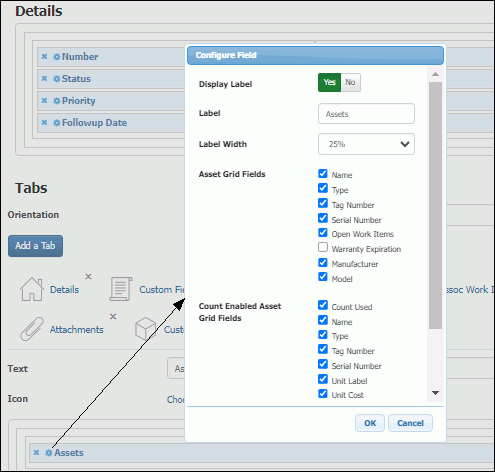
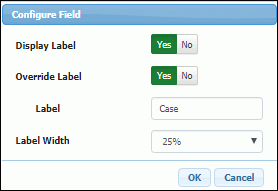
After adding a field, click the Configure
Field icon and use the Configure
Field dialog to enable or disable the field label,
update the field label, and select the field label width (which is a percentage
of the column in which the field is included). Note that the label width
will not be applicable on list fields that display a label above the field.
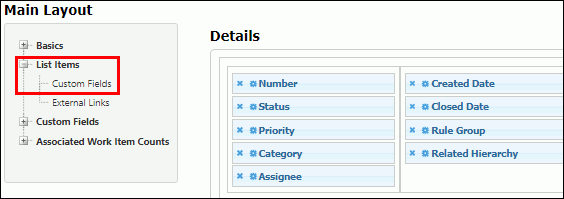
Global custom fields can be defined in the Custom Fields screen for the type of work item screen for which you're creating a layout, and additional custom fields can be defined for a category, asset type, change type, CI type, and cost center. When you drag the Custom Fields field under the List Items section to include all of the custom fields at once, in the Configure Field dialog you can control which types of custom fields to include on layouts: global custom fields, additionally defined custom fields (defined for a category, asset type, CI type, change type, cost center), or both. Note that all custom fields that have met any conditional display conditions will be created upon mySupport work item submission regardless of whether they are included on a mySupport submission layout.
For work item and customer profile layouts, you can use the Asset Grid Fields checkboxes to specify the columns included for the Asset list field. Note that the Count Enabled Asset Grid Fields section will not be included if no count enabled asset types are configured.
For mySupport layouts:
Select Yes in the Prompt field to initially display the Category Select dialog when the Incident or Change Submit screen appears.
Select Yes in the Show Search field to include a search field in the Category Select dialog.
Select Yes in the Require Search Text for Results field to prevent display of the results until the user has started typing.
For Rep Client layouts, you can use the Preview button at the bottom of the Layout screen after adding required fields to the form to display your layout. You’ll need to select a record to use for displaying field data.
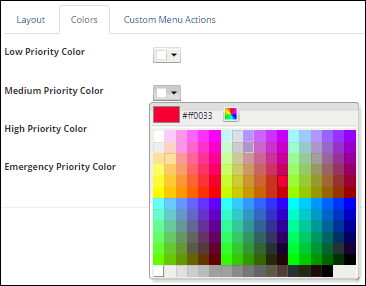
Use the Colors tab to configure the priority-based background colors for the upper portion of the Incident, Problem, and Change screens. You can choose from the color picker or input an HTML color code.
Use the Custom Menu Actions tab in the Layout screen to create a new tab, and link via an icon to a URL. Example
Note that this tab and option will not appear in the work item screen until after the work item is saved because the URL will be generated with the work item ID appended to it.