Use the Options and Tools| Administer | Event Log screen to view Event Log entries that reflect application errors and messages and the date and time that iSupport agents run. You can also use the Event Log Desktop view or build a custom view using the Config - Event Log data source in the View Designer.

Informational messages and warnings from the iSupport services, Desktop, and mySupport portal are logged by default to a database table. You can specify logging to occur in the Windows Event Log instead by changing variables in the Logging Management section in the web.config file.
Use the Event Log Type field to display entries in the database table or entries in the Windows Event Log. If using database logging, you can use the Number of Days Until Auto Purge field to specify a number of days after which entries will be deleted automatically by the Database Maintenance agent.
In the event the database logging provider fails to write an event to the database, the event and an additional event for the failure will be written to the iSupport Windows Event Log. If that fails, it will write to the Windows Application Log.
The Database option enables you to perform a search; use the Search
field to perform a literal case-insensitive search for a character string
within all data displayed in the current view. To perform a simple search,
place the cursor in the Search field, enter the character string, and
click the Quick Search ![]() icon.
You can search for an incident number in an incident view, even if it
doesn't exist in a displayed column.
icon.
You can search for an incident number in an incident view, even if it
doesn't exist in a displayed column.
Click the Advanced
Search ![]() icon to
set criteria for filtering data in a view. Use the
Match <All/Any> field to
specify whether you want every <field>
<comparison method> <value> search condition to be
met, or any configured condition to be met. Use the Add Condition and
Remove Condition
icon to
set criteria for filtering data in a view. Use the
Match <All/Any> field to
specify whether you want every <field>
<comparison method> <value> search condition to be
met, or any configured condition to be met. Use the Add Condition and
Remove Condition ![]() icons
to display and remove a <field>
<comparison method> <value> search condition. Click
the Add Condition
icons
to display and remove a <field>
<comparison method> <value> search condition. Click
the Add Condition ![]() icon
if you wish to include another condition. You can use the Add Condition
Group
icon
if you wish to include another condition. You can use the Add Condition
Group ![]() icon to put a set of search conditions
to be evaluated together in a group. Click the Save button to enter a
name for the search and save it. The Saved Searches
icon to put a set of search conditions
to be evaluated together in a group. Click the Save button to enter a
name for the search and save it. The Saved Searches ![]() icon
will display; hover over it to display saved searches.
icon
will display; hover over it to display saved searches.
Use the Action dropdown menu to open and export records and clear the event log.
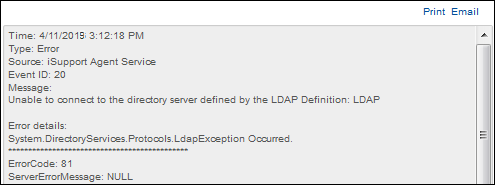
Use the Export option on the Actions menu to export view data; you'll be able to export all records at once, the current page, or a range of pages, all based on your current view, search, and sorting criteria. If you click on the date/time link of an entry, the entry will appear in a window for viewing, printing, or sending in an email.

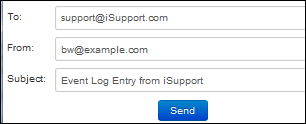
Click the Email link to send the entry in an email. Change the To address, From address, or subject line in the Email Information dialog if applicable. Once you click OK, the email is sent.

The Source in the Event Log screen indicates the module in which the entry originated; entries include End User, Survey, Desktop, or iSupport Agent Service (which handles all of the iSupport agents).
The Event ID indicates the agent causing the error or informational message.