Configuring Single Sign On Integrations
 Configuring SAML
With Microsoft Azure Active Directory
Configuring SAML
With Microsoft Azure Active Directory
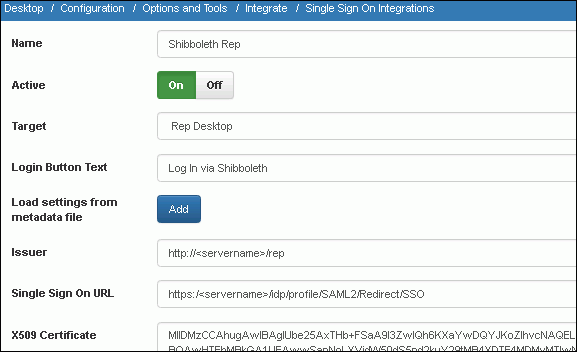
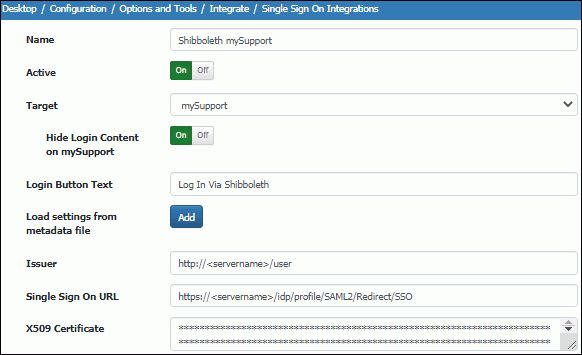
Use the Options and Tools| Integrate | Single
Sign On Integrations screen to
enable a third party application (such as Shibboleth and Otka) to pass
user credentials so that a user can sign in to mySupport, the iSupport
Desktop, or the Mobile interface with the same credentials that they use
to log into another application. Note that iSupport's login method
(forms-based) must be enabled for the applicable mySupport, Mobile, or
Desktop interface (not Microsoft Windows-based authentication).
In order to use
a third party integrity provider (IP) for this SAML-based SSO Integration
feature, you will need to do some setup in the administration screens
of your IP and the URLs below may be needed. If you need to register
iSupport with an identity provider that will be used for authentication,
it must be done prior to creating/obtaining the metafile from the identity
provider. Then use the metadata file in the Load Settings From Metadata
File field; when loaded, it will populate the Issuer, Single Sign On URL,
and X509 Certificate fields. The following provider and consumer URLs
for all four iSupport sites might be needed to register iSupport with
an identity provider that will be used for authentication:
Rep Portal
Issuer: rep_url/
Consumer: rep_url/SingleSignOn.aspx
User Portal (mySupport)
Issuer: user_portal_url
Consumer: user_portal_url/Account/SSO
Mobile (external)
Issuer: mobile_url
Consumer: mobile_url/SingleSignOn.aspx
Mobile (internal)
Issuer: rep_url/Mobile
Consumer: rep_url/Mobile/SingleSignOn.aspx
If using Shibboleth, you’ll need to change the URL in the Issuer field
to the URL for the applicable iSupport interface (Rep or User) and change
POST to Redirect
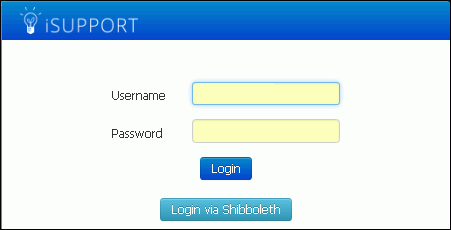
in the URL in the Single Sign On URL field. The iSupport login dialog
will include a button labeled with the contents of the Login Button
Text field in the Single Sign On Integrations screen; further dialogs
will appear as required by the identity provider.
Use
the Login Button Text field to enter the text to appear in the button
for customers to use to log in via the mySupport
login dialog; if On is selected in the Hide Login
Content on mySupport field, the default Login button will be hidden.