Creating
a Standard View in iSupport
Creating
a Standard View in iSupport
![]() Naming a View and
Specifying Access
Naming a View and
Specifying Access
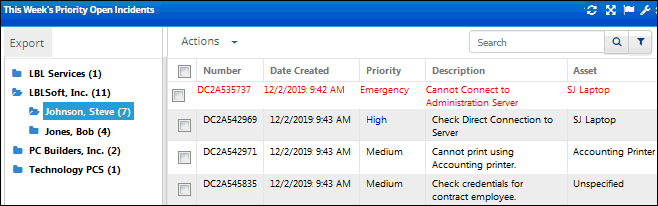
This topic references creation of a custom rep view named This Week’s Priority Open Incidents.
The data source fields available for the view appear in the navigator on the left; drag the applicable fields to the applicable section on the right. Note: The Date Generated field in the Incident source contains scheduled ticket information.
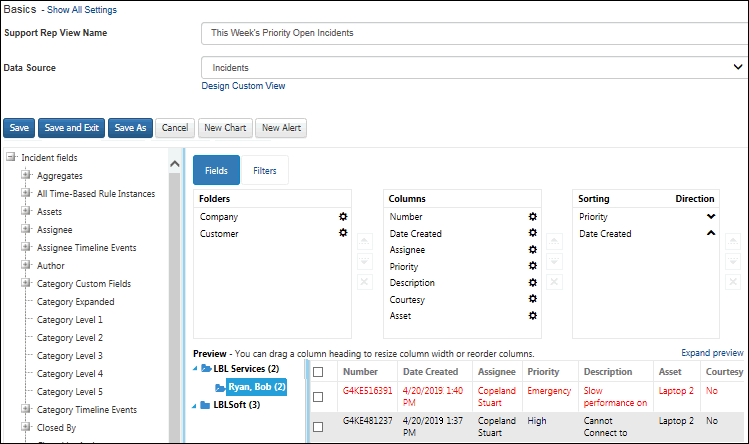
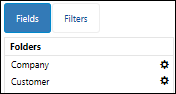
To display a data source field as a folder on the left side of the view, drag the field into the Folders section. Any folders after the first folder will appear as a subfolder in the view.
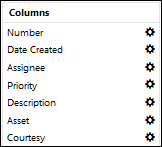
Drag the data source fields that you wish to display as columns in the Columns section; columns listed will appear in order from left to right.
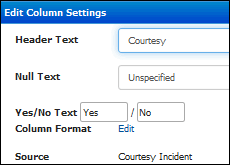
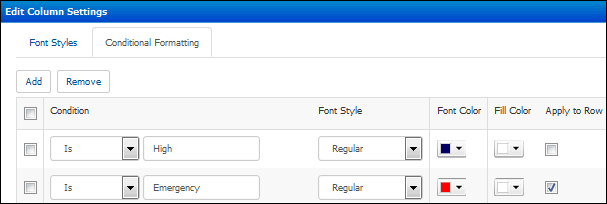
Click the Configure  icon next
to a column field to format
how it will appear in the view.
icon next
to a column field to format
how it will appear in the view.
Drag the fields on which the view should be sorted into the Sorting
section, in the order (from top to bottom) in which the fields should
be sorted relative to the rest of the fields in the view. Ascending  sorts field values in order from first to last/lowest
to highest (alphabetically A-Z, lowest number to highest number, or in
the case of Priority, Low to Emergency). Descending
sorts field values in order from first to last/lowest
to highest (alphabetically A-Z, lowest number to highest number, or in
the case of Priority, Low to Emergency). Descending  sorts field values in order from last to first/highest to lowest (alphabetically
Z-A, highest number to lowest number, or in the case of Priority, Emergency
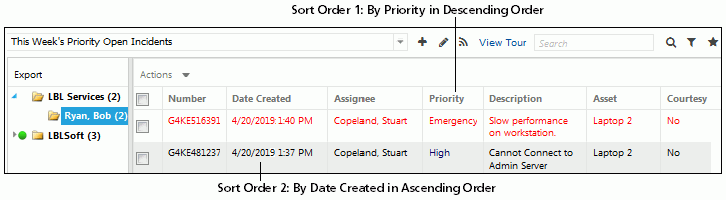
to Low). In this
example, incidents are sorted first by priority and
then by date created.
sorts field values in order from last to first/highest to lowest (alphabetically
Z-A, highest number to lowest number, or in the case of Priority, Emergency
to Low). In this
example, incidents are sorted first by priority and
then by date created.
Use the Filters tab to set parameters for minimizing the amount of data
that appears in the view. Select the field for which data should be minimized;
comparison methods applicable to the field will appear in the dropdown.
Select the comparison method and then enter the value to be used with
it if applicable. Use the Match <All/Any>
field to specify whether you want every <field>
<comparison method> <value> condition to be met, or
any configured condition to be met. Use the Add Condition  and Remove Condition
  icons to display and remove a <field>
<comparison method> <value> condition. Click the Add
Condition icon if you wish to include another condition.
You can use the Add Condition Group
icons to display and remove a <field>
<comparison method> <value> condition. Click the Add
Condition icon if you wish to include another condition.
You can use the Add Condition Group  icon to put
a set of conditions to be evaluated together in a group.
icon to put
a set of conditions to be evaluated together in a group.
Note: If a date field is selected, the Between comparison method does not include beginning and ending dates. The Current Week method is based on a Sunday through Saturday time frame.
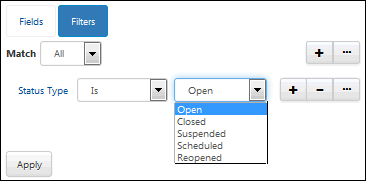
In this example, the view will only include incidents with an open status.
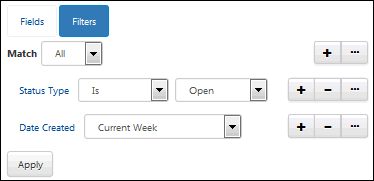
This example also includes a filter on the date created; the view will only include incidents with a creation date within the current week.
The view will save the filter immediately; click the Apply button to update the preview.
The Preview area to display your view; click the Expand link to display the view full-screen. Note: If using System BIOS fields in the Asset Scans - Scheduled data source, some values may not be populated; some system vendors do not provide this data in the WMI system profile.
To resize the width of a column, drag your cursor on the column edge to the desired width; the width in pixels will appear in a tooltip. You can also resize columns when displaying views in a Desktop component.