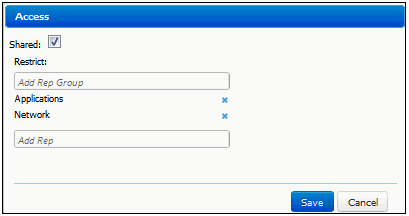
Use the ![]() Access option on the dashboard's right-click menu to specify the individual
support representative(s) or group(s) that
can access the dashboard. Note that support representative permissions
control display of this option. Select Shared to make the dashboard available
for other support representatives to add to their Desktops via the Add
Existing dashboard menu option. To make the dashboard available only to
specified groups, place your cursor in the Add Rep Group field and select
the groups. To make the dashboard available only to selected support representatives,
place your cursor in the Add Rep field and select the support representatives.
Access option on the dashboard's right-click menu to specify the individual
support representative(s) or group(s) that
can access the dashboard. Note that support representative permissions
control display of this option. Select Shared to make the dashboard available
for other support representatives to add to their Desktops via the Add
Existing dashboard menu option. To make the dashboard available only to
specified groups, place your cursor in the Add Rep Group field and select
the groups. To make the dashboard available only to selected support representatives,
place your cursor in the Add Rep field and select the support representatives.

Dashboards can be added, deleted, renamed, and designated as Shared
via the Alerts
and Dashboards Manager (accessed via the Desktop Content ![]() menu). Dashboards can be
automatically added to the Desktops of specified support representatives
via the Access column in that screen. You can also push the dashboards
associated with a group specified as primary to a support representative’s
Desktop when you assign the primary group in the Support
Representative Profile screen.
menu). Dashboards can be
automatically added to the Desktops of specified support representatives
via the Access column in that screen. You can also push the dashboards
associated with a group specified as primary to a support representative’s
Desktop when you assign the primary group in the Support
Representative Profile screen.
To control available dashboard components, set Desktop colors, and select the features involved in Global search, use the Options and Tools | Customize | Desktop Settings screen in Configuration.
Note: The update and refresh of Awareness and Chat functionality, as well as Desktop components, can apply to only four open pages at one time. The message “Awareness and chat not available” or “Auto refresh and chat not available” will appear if this is exceeded. These limitations do not apply if you are using Windows Server 2012 with WebSockets enabled and the current version of iSupport’s supported browsers.