Follow these steps if you are creating a second/additional mySupport portal and it will use a different app URL name.
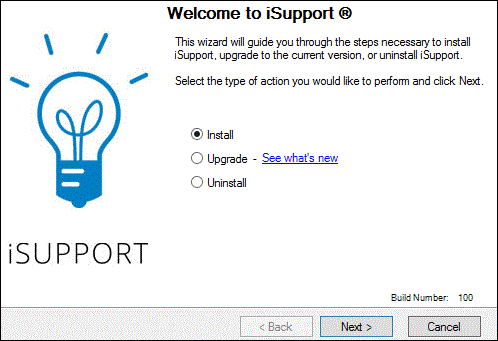
Run the iSupport installer (setup.exe), select Install in the Welcome dialog, and click Next.
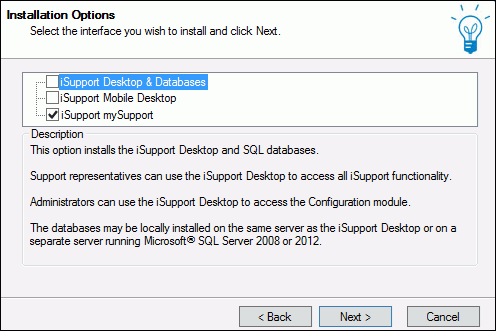
In the Installation Options dialog, deselect all of the options except the iSupport mySupport option and click Next.
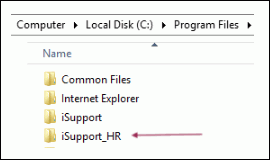
In the iSupport File Path dialog, add the name of the new portal to the existing path in the Destination Folder field. (Note that the name of the new portal is named "HR" in the example screenshot.) This will allow the installer to create the folder required for the new portal files. Note that it must be different from the default User folder.
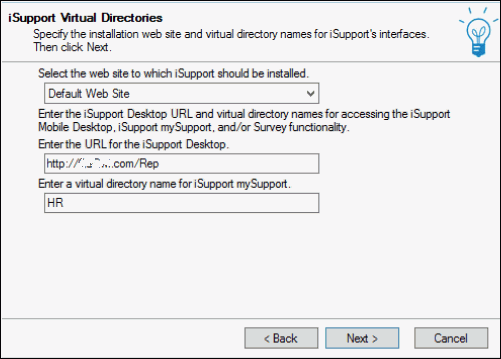
In the iSupport Virtual Directories dialog, enter the following:
Web site: Select the web site to which the mySupport portal should be installed.
URL: Enter the URL for your Rep site on the server (the URL your reps use to access the application).
Virtual directory for mySupport: Replace the default User entry with the name of the new portal (the virtual directory name for the mySupport portal site); this name will be used at the end of the URL for customers accessing the portal. Do not use spaces in the virtual directory entries.
Example destination after installation
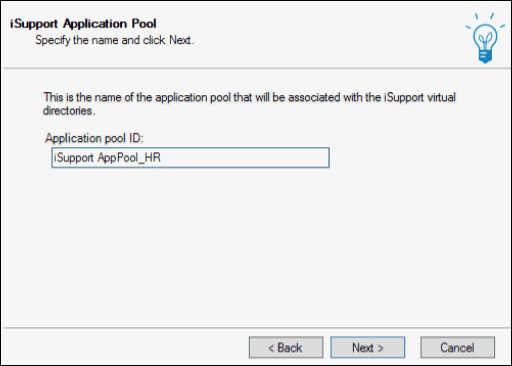
In the iSupport Application Pool dialog, enter the name of the iSupport App Pool under which the new portal will run. This name must be different from your existing iSupport App Pool account, but for easy identification you could add the name of the new portal after "iSupport AppPool". Note that each additional mySupport portal created will require its own application pool in IIS. Click Next.
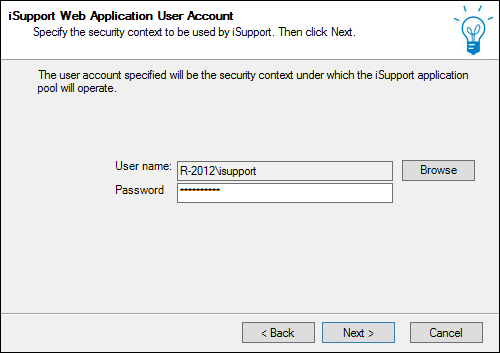
In the iSupport Web Application User Account dialog, select the user account for the iSupport web application to use to connect to SQL Server. Click Next.
The Review Settings dialog appears with your selections; if you need to make a change, click Back. Otherwise, complete the installation.
Set the authentication method for the second mySupport site. Go to the path in which you installed the second portal files, open the Utilities folder, and run the iSupport Configuration Utility.exe. In the mySupport File Path field in the iSupport mySupport Settings section, ensure that the location of the second portal is selected. Then select the authentication method to use for the mySupport portal interface: iSupport Login (Forms) or Microsoft Windows-Based (Windows Authentication). Click the Apply Button and then click the OK button.
Create the new portal via settings on the Configuration | Core Settings | mySupport section on the iSupport Desktop:
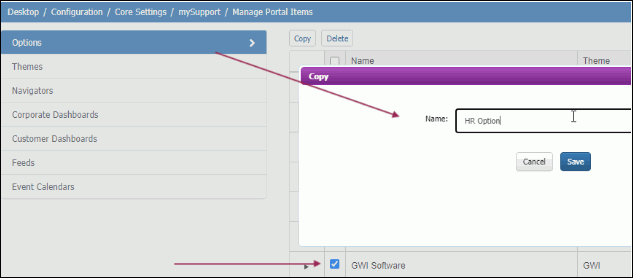
If you would like the new mySupport portal to have the same option set and navigator layout, first go to mySupport | Manage Portal Items.
On the Options tab, select the option set and click the Copy button. Name the option set and save. Example
On the Navigators tab, select the navigator and click the Copy button. Name the navigator and save.
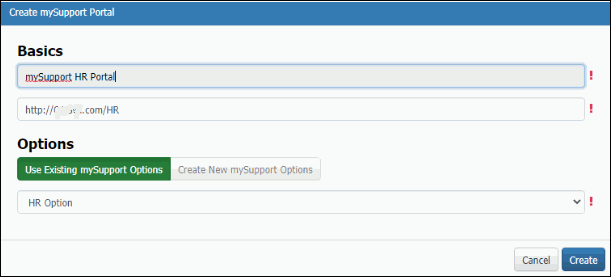
Go to mySupport | Portals and click the Create button. Enter the portal name and URL in the Basics section, select Use Existing mySupport Options, and enter the name of the copied option set. Example
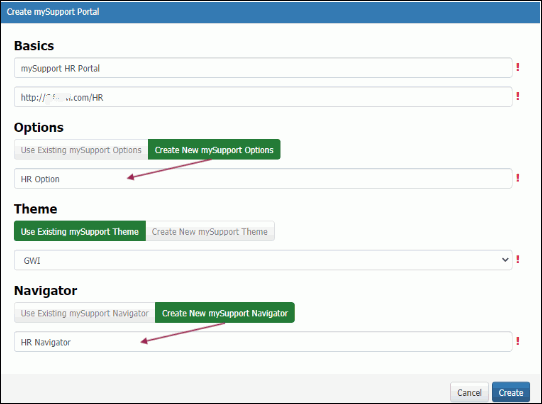
If you would like the new mySupport portal to have a different option set and navigator layout, go to mySupport | Portals and click the Create button. Enter the portal name and URL in the Basics section; select Create New mySupport Options and enter the name of the option set in the Options section, use a new or existing theme in the Theme section, and select Create New mySupport Navigator and enter the name of the navigator in the Navigator section. Example