Configure webhooks for posting iSupport’s asset, incident, problem, change, customer, opportunity, knowledge, and correspondence data to a web application. Use the Options and Tools | Integrate | Webhooks screen to specify a web application URL for iSupport to post data to and the fields containing the data you want to receive, and iSupport will post the field data to the URL when configured rule conditions and time frames are met.
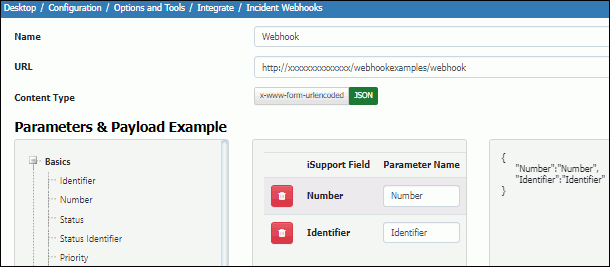
In the Webhooks screen in the applicable configuration module, enter the name of the webhook definition that will be used in the Rule screen and the URL to which iSupport data should be posted. Drag the iSupport Incident data source fields containing the data you want to receive into the frame on the right, and enter the corresponding fields on your web form in the Parameter Name column. Use the Content Type field to enable the output to be set to JSON (JavaScript Object Notation) Mime type and display the text of what the webhook will generate.

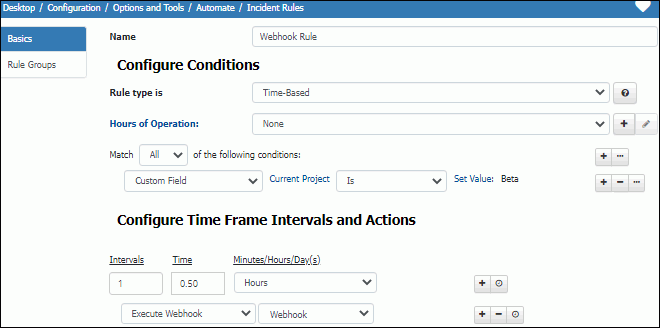
Use the Rule screen in the applicable configuration module to configure the conditions and time frame on which the post action will occur. Select the rule type, enter the condition(s) to be met in order to initiate the post, select the Execute Webhook action, and then select the webhook definition. Be sure to add the rule to a rule group. See Creating Rules for more information.
