Use incident rules to ensure that customer issues are acknowledged and addressed in an acceptable time frame. This scenario involves creating and setting a default custom status for when an issue is received, having support representatives change the status to a different open status when they start work on an issue, enable a rule to send a notification when the status change occurs, and enable a rule to notify support representatives when an incident has the default custom status for a specified time frame (support representatives have not changed the status and therefore not started work).
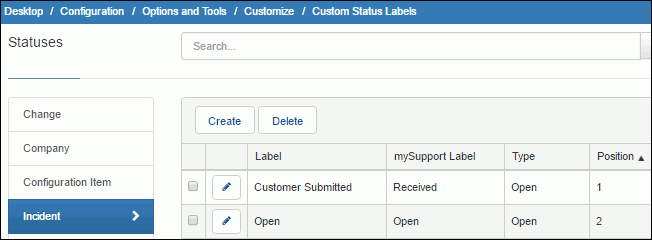
Use the Custom Status Label screen to create a custom status label indicating that the new incident has not yet been acknowledged, accepted, assigned, etc. This label will be set as default (in the next step) and you will need to train your support representatives to change from this new status to the status label you want to use to indicate the required acknowledgment action has been taken. In this example, you would train your support reps to change the status from Customer Submitted to Open as soon as they begin work.

Use the Default Status field in the Email | Accounts | Inbound Settings screen and the mySupport Options screens to assign the new status to incidents submitted via email and iSupport. It is possible to have any number of email accounts and mySupport option sets configured, so you’ll need to ensure you’ve updated all that are applicable. You may also need to check the incident templates and rules that have already been configured in your installation to make sure all avenues of incident submission available to your customers will result in the application of your new custom status label.


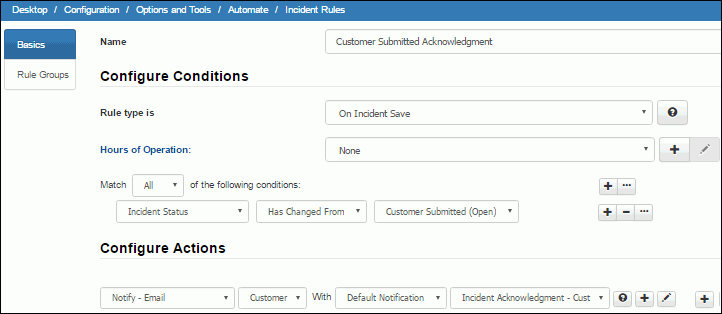
Notifications are sent in iSupport via rules; the rule in the example below sends an email to a customer when a support representative changes the status from the default Customer Submitted status.
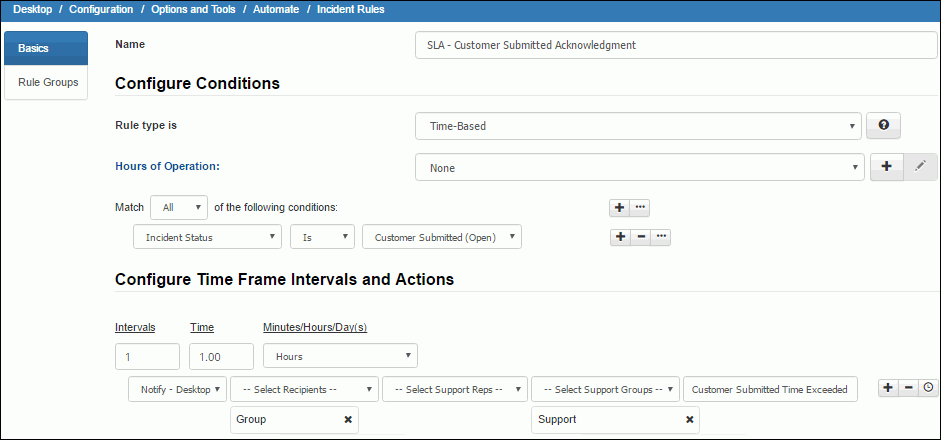
The example below shows a simple time-based rule that is configured to send a desktop notification to the assignee’s entire group any time an incident remains in the new Customer Submitted status longer than one business hour. You may want to configure additional time intervals with escalating actions or more than one rule for this so that additional conditions (such as the priority of the reported issue or the affected customer’s group) could be considered when setting the time interval and actions.
It’s important to have time-based rules that take automated actions to ensure that every incident is addressed within the acceptable/agreed upon time frame; automated warnings and escalations are valuable for ensuring that nothing slips through the cracks and that your staff focuses on the incidents that need immediate action. You can use the Report View Designer to configure a view that reports statistics for the time-based rules you have created; an example is shown below.

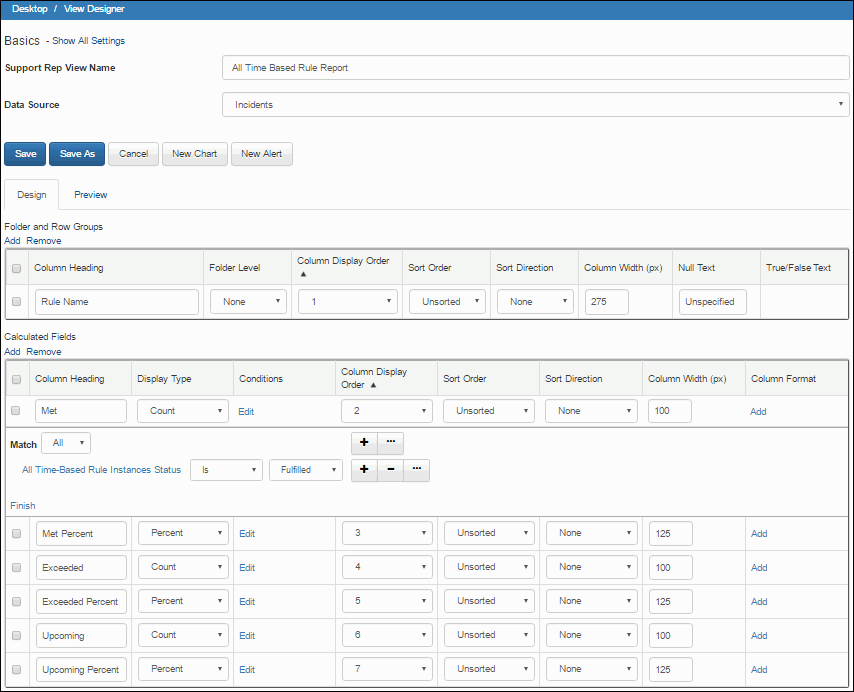
The view's design is shown below. For the Rule Name column, the Incident Fields > All Time-Based Rule Instances > Rule > Name field was used in the Folder and Row Groups section. The Calculated Fields section was used for the rest of the columns that display the counts and percentages of each of the possible time-based rule status outcome. For each column, the Incident Fields > All Time-Based Rule Instances > Status field was used in the condition. (Note that in this example the label “Met” was used in the column headers instead of the actual status value in iSupport which is “Fulfilled”.
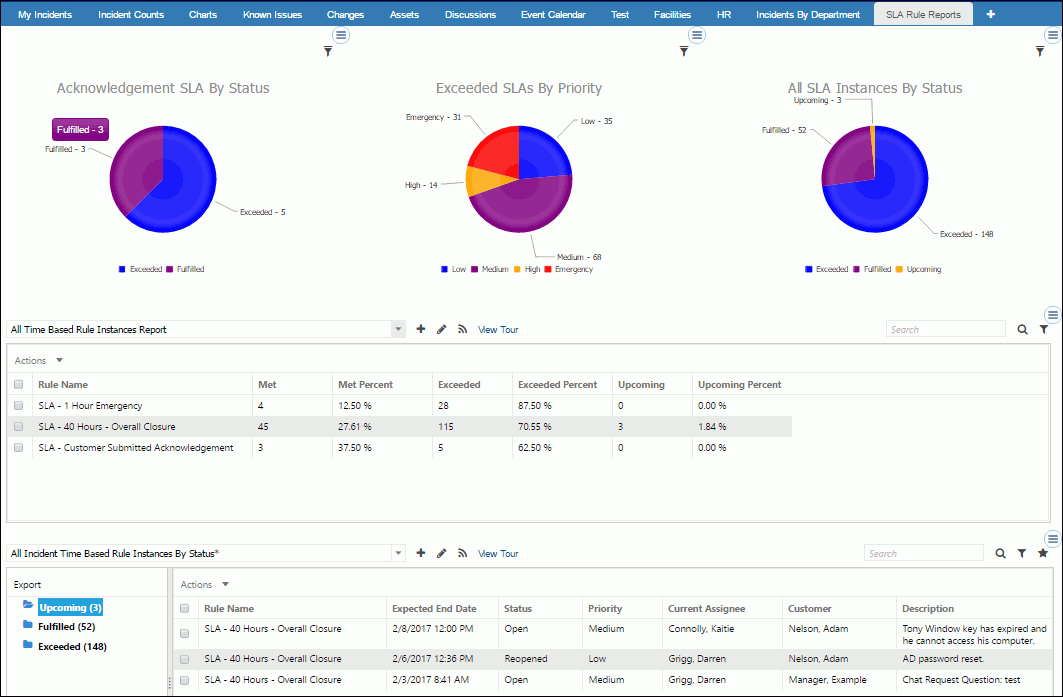
Charts can also be created to display the results of time-based rule instances. If you prefer to drill through to the underlying view and incidents, you may wish to use standard views with no folders as the foundation for your charts; that way you’ll be able to click on any chart section to display a new window with the underlying view filtered to the records represented by the chart section. From there you can start opening the individual incidents, export, or use any other feature available from standard views. A report view (like the one above) can be used to build charts, but those charts wouldn’t offer the drill-through options. The dashboard shown below includes three rule-based charts which fully support drilling through all the way to the actual incidents, a report view, and a standard view.
