Common Entry Screen Features Common Entry Screen Features
For all browsers, you can drag files into the Attachments field in any screen.
If configured in the Preferences screen (accessed via the Desktop menu), the text editor toolbar will appear when you place your cursor in a text area field; you can also display it by clicking the field label link to display a larger window. You can use the Image Upload icon to upload saved screenshots and other images, or the Insert Image icon to insert a URL to an image on a web site. By default the Tab key will move from field to field; you can enable the Tab key to insert spaces instead by setting an option in the Preferences screen. Note: When you cut and paste HTML in fields with a text editor toolbar, the HTML may contain interpretable command language which may result in undesired effects. If this occurs, remove the content from the field. You can use screenshots and attachments as an alternative. Note: if the bullet/indent option is applied to the entire field instead of only the selected text, put the cursor before each list item in the existing text and click the New Paragraph icon in the toolbar. After doing this for each item, highlight all the items and select the desired list type in the toolbar.
In fields with a text editor (for example, the Description field in the Incident screen), you can paste images via the current version of Google Chrome (TM). If using the current version of Apple® Safari®, Mozilla® Firefox®, or Microsoft® Internet Explorer®, you can drag and drop images into fields with a text editor.
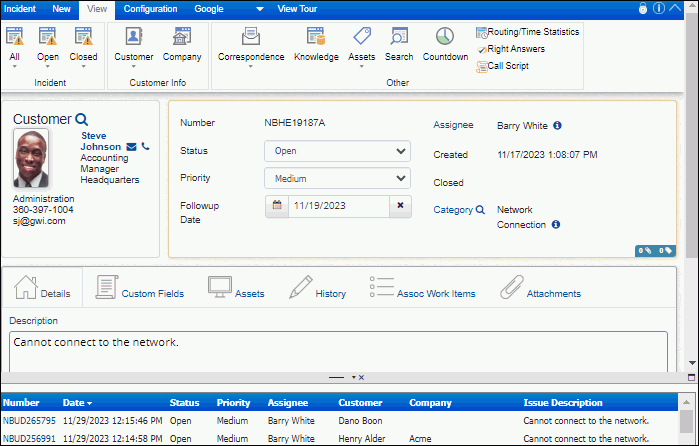
iSupport work item screens include a view
frame at the bottom of the screen for selecting views
and displaying results from View menu selections. The frame will be minimized
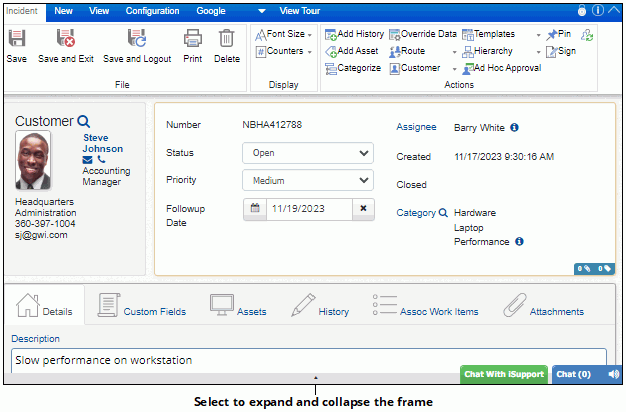
by default; click the up arrow  icon to expand and collapse the frame. View menu selections and ticket
count options will
display in the view frame. Your selected view and
settings will be stored in a cookie, so your selection will be retained
until you change it again.
icon to expand and collapse the frame. View menu selections and ticket
count options will
display in the view frame. Your selected view and
settings will be stored in a cookie, so your selection will be retained
until you change it again.
A Save and Logout ![]() icon can be enabled in configuration for saving the record and closing
the current session. This option is typically used when accessing
a record via a link in an email.
icon can be enabled in configuration for saving the record and closing
the current session. This option is typically used when accessing
a record via a link in an email.
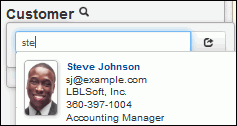
In screens with a Customer field, you can type ahead in the Customer field to search for a customer.
The Font Size feature enables you to display the lettering on the screen in a small, default, and large size font.

Custom menu actions to open a URL may be configured to appear in the upper menu bar.
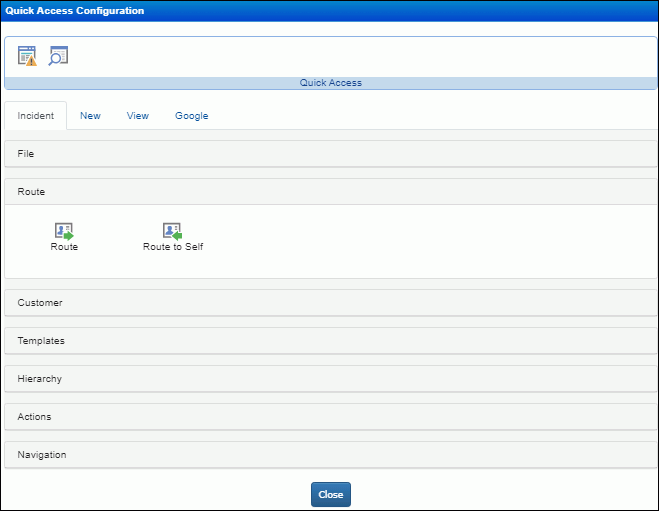
Use
the Open Quick Access Dialog ![]() icon
to add toolbar icons for commonly-used functions to the menu bar at
the top of the screen.
icon
to add toolbar icons for commonly-used functions to the menu bar at
the top of the screen.
In the Quick Access Configuration dialog, menu option icons display for you to drag to the Quick Access section.
The
Lock Ribbon to Top  icon enables you to retain the ribbon at the top when you scroll down
the screen; it will change to an Unpin
icon enables you to retain the ribbon at the top when you scroll down
the screen; it will change to an Unpin  icon to
stop retaining the ribbon when you scroll.
icon to
stop retaining the ribbon when you scroll.
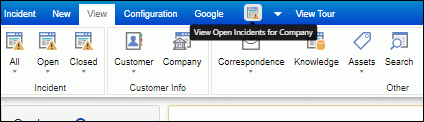
Use the white arrow  icon to collapse the menu
option ribbon; click it again to redisplay the ribbon.
icon to collapse the menu
option ribbon; click it again to redisplay the ribbon.
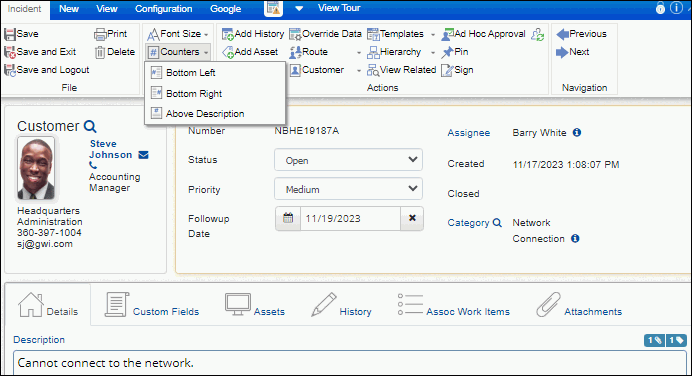
An icon bar is included in the
details section on work item screens; depending
on the type of work item, it can contain the number of attachments,
assets, others to notify, or associated work items. The Counters
 icon is included at the top of the screen for
you to select the placement of the icon bar.
icon is included at the top of the screen for
you to select the placement of the icon bar.
Next  and Previous
  navigation options will appear in
the ribbon bar when an item is opened from the View component. The
Next option will open the next record in the view, and the Previous
option will open the previous record listed in the view. This applies
to all iSupport record types within folders.
navigation options will appear in
the ribbon bar when an item is opened from the View component. The
Next option will open the next record in the view, and the Previous
option will open the previous record listed in the view. This applies
to all iSupport record types within folders.
If AI
integration is enabled, an AI  icon
is included on the text
editor toolbar in fields throughout iSupport. You will be able
to select from a list of AI Editor
prompts that can be accessed via the text editor
toolbar for actions such as fixing the grammar, formalizing the text,
elaborating or shortening the text, and more. You
can use the Generate button to replace the text, and use the
Insert
button to replace the text in the applicable field. If
enabled, you can use the Custom Prompt option to enter your own prompt.
icon
is included on the text
editor toolbar in fields throughout iSupport. You will be able
to select from a list of AI Editor
prompts that can be accessed via the text editor
toolbar for actions such as fixing the grammar, formalizing the text,
elaborating or shortening the text, and more. You
can use the Generate button to replace the text, and use the
Insert
button to replace the text in the applicable field. If
enabled, you can use the Custom Prompt option to enter your own prompt.